
This chapter describes how to import Adobe Prelude markers into Adobe Premiere Pro CC via the Strawberry Adobe CC panel extension.
Step 1: Configuring Prelude
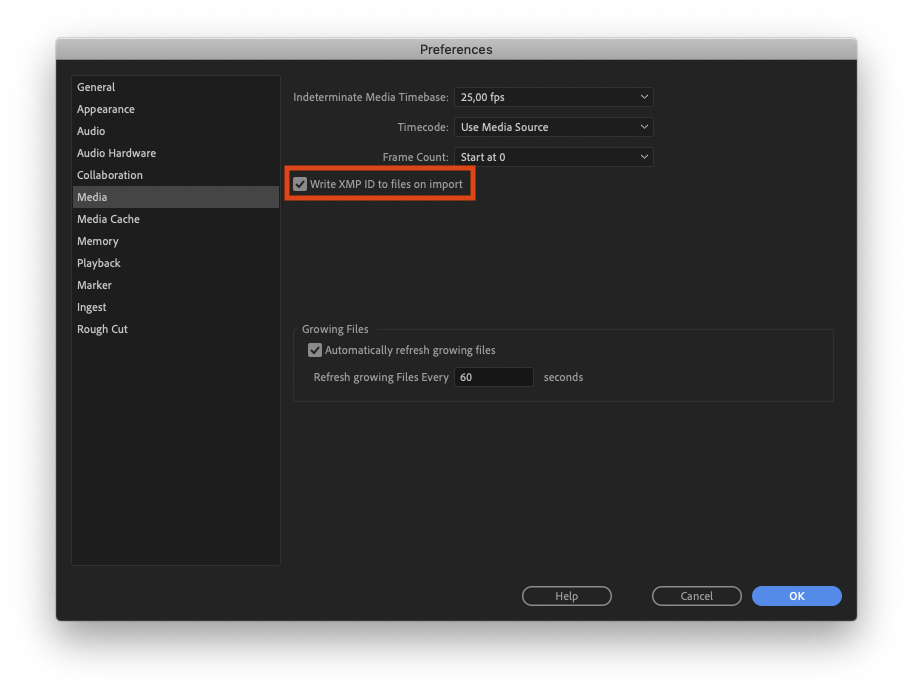
1. Open Prelude and navigate to “Preferences \ Media”
2. Enable the setting “Write XMP ID to files on import”. This will ensure that Preludes stores all of your markers & comments to the media files themselves.
Step 2: Configuring Premiere Pro CC
Make sure that Premiere XMP behavior is configured as recommended.
Step 3: Usage
Import the Prelude assets into Premiere Pro by using the Strawberry Adobe panel extension. If you don’t see the markers right away, either wait for the next automatic “sync” or go to the Strawberry thick client and click on the “Sync” button. The Prelude markers should now appear within the Premiere master clip.
Need more help with this?
Visit the Projective Support Websites