Configuration
1. Start the Strawberry client application.
2. On the Configuration screen, click next.
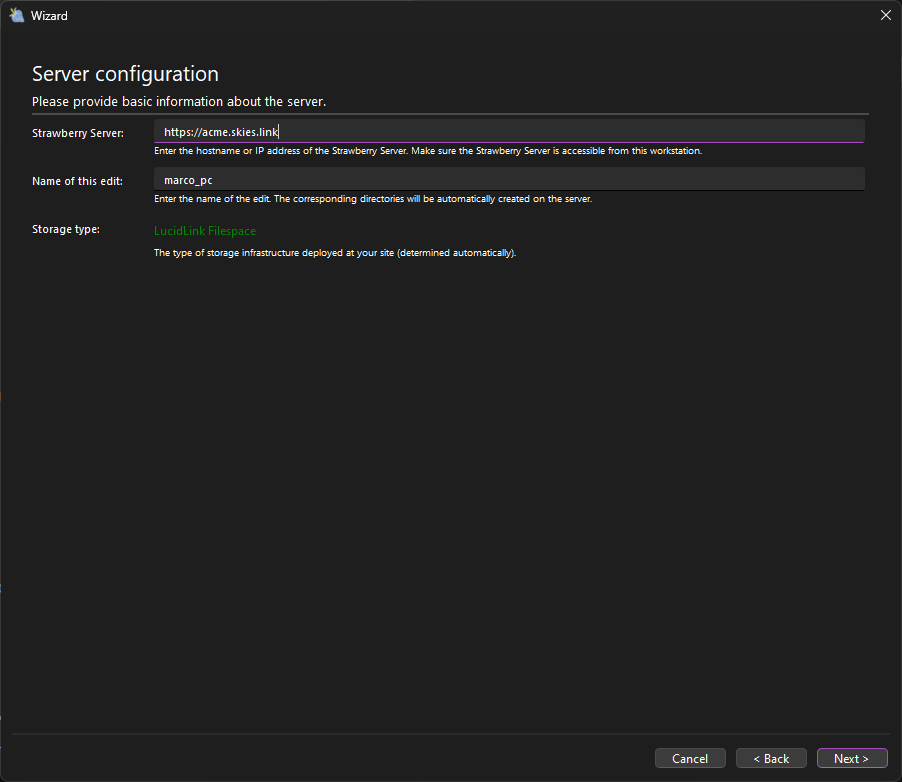
3. In the Server Configuration section, you need to provide the following information:
Strawberry Server
Enter the full URL of your Strawberry Skies server, including the https:// prefix. If you have been invited to Skies by another user, you will find this URL in the subject line of the invitation email in your inbox. If you are unsure what the URL of your company’s Strawberry Skies server is, please contact your Skies Administrator.
Name of this edit
Choose a name that uniquely identifies your Computer. An example of a valid name is sarah-remote.
Storage Type
The storage type is determined automatically and should show Lucidlink Filespace in green letters.
Here is an example configuration
4. Click Next.
5. Optionally, in the Paths to editing application you can add additional applications.
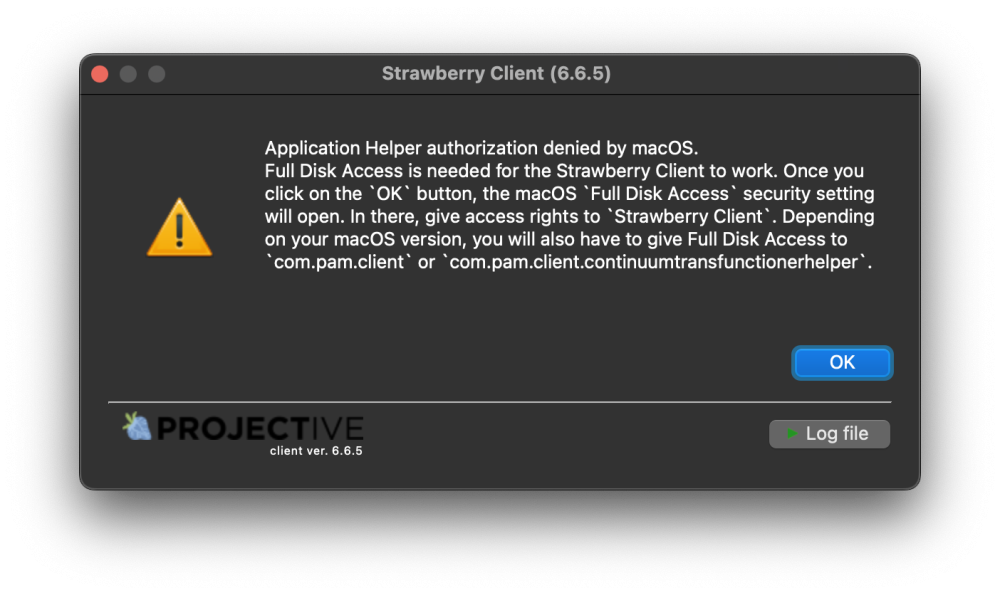
6. Once you click Finish, the Strawberry client will restart. On the first launch, you will see a permission request for Full Disk Access.
7. To fix this, click on the OK button. This will open macOS Full Disk Access security settings.
8. Enable access for Strawberry Client. Depending on your macOS version, you must also give Full Disk Access to com.pam.client or com.pam.client.continuumtransfunctionerhelper. Please check whether these entries are available in the list and if so, toggle them for full disk access.
7. The Strawberry client will automatically connect to your organization’s LucidLink filespace upon launch.
8. You can now log in with your Strawberry credentials and open open a project.


