
Note to Apple Silicon Users
To install Osiris 2 on Apple Silicon hardware, you first need to Allow user management of kernel extensions from identified developers. The related manual chapter will guide you through that process.
Installation
1. Download the latest Osiris 2 version for macOS.
2. Run the .pkg installer.
3. Follow the installation instructions.
4. Start Osiris 2 via Spotlight search or the macOS “Applications” folder.
5. On the first launch, you will see this message:
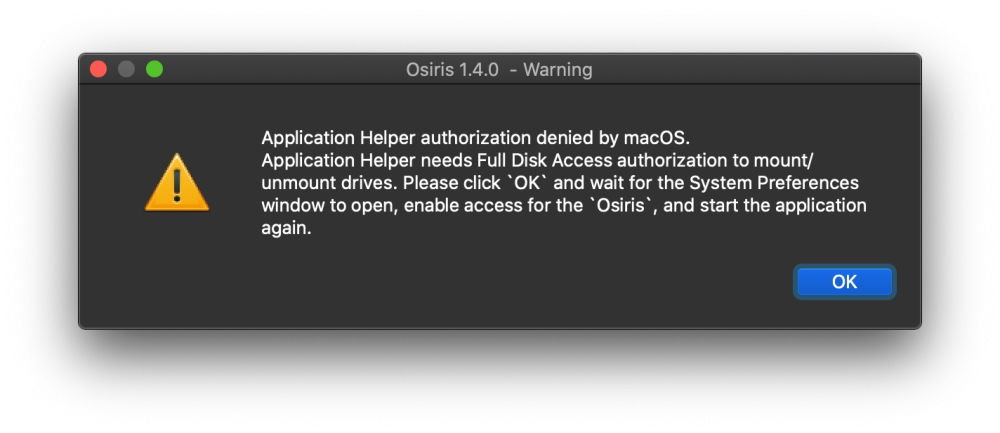
6. Click OK and wait for the “System Preferences” window to open.
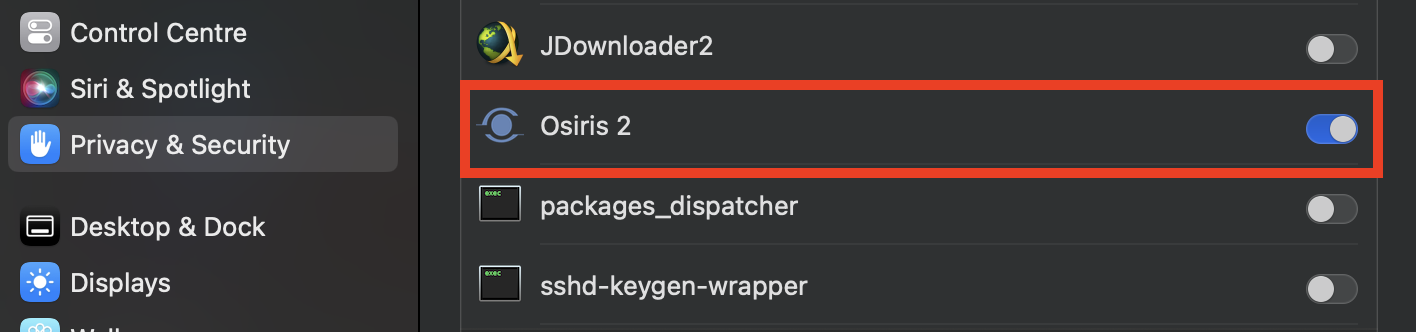
7. Now click Full Disk Access and unlock the settings by clicking the toggle button next to Osiris 2.
8. Start Osiris again. If you still see the message “Application Helper Authorization denied by macOS”, check the troubleshooting section at the bottom of this page.
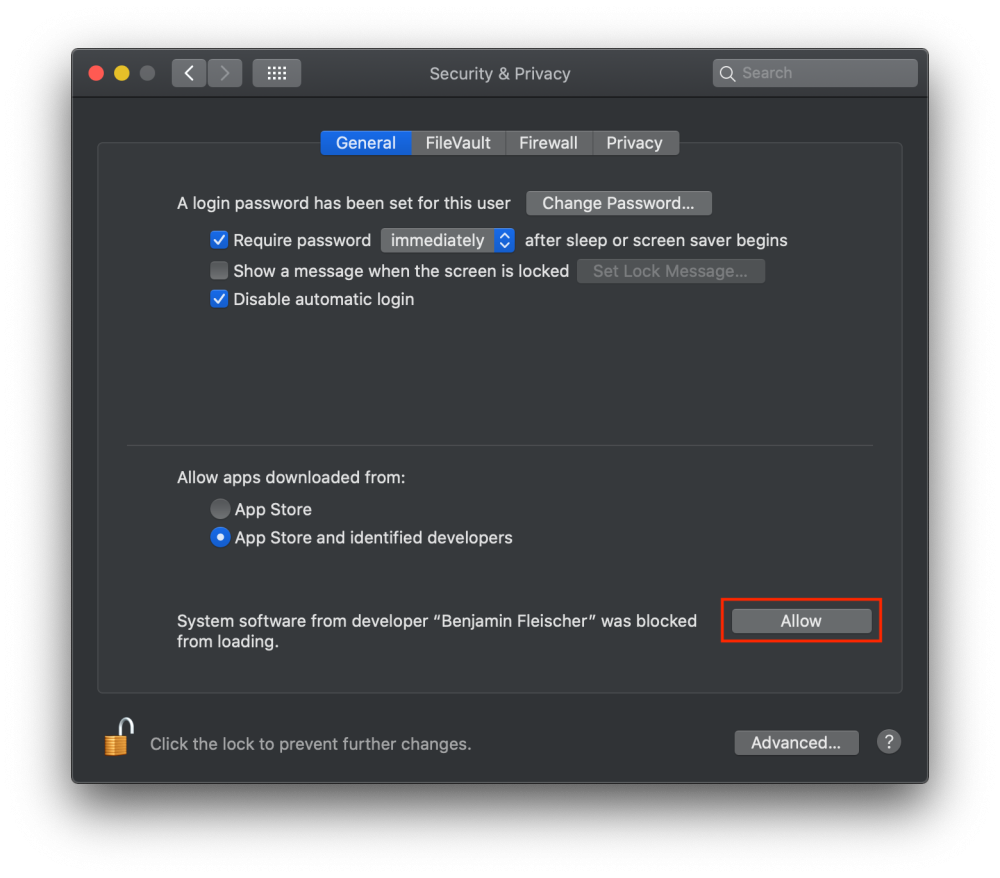
10. Once you have created your first Osiris mount and attempted to mount it, you will see the following messages. It might be that you see two different messages for the same thing, but please focus on the message as shown here:
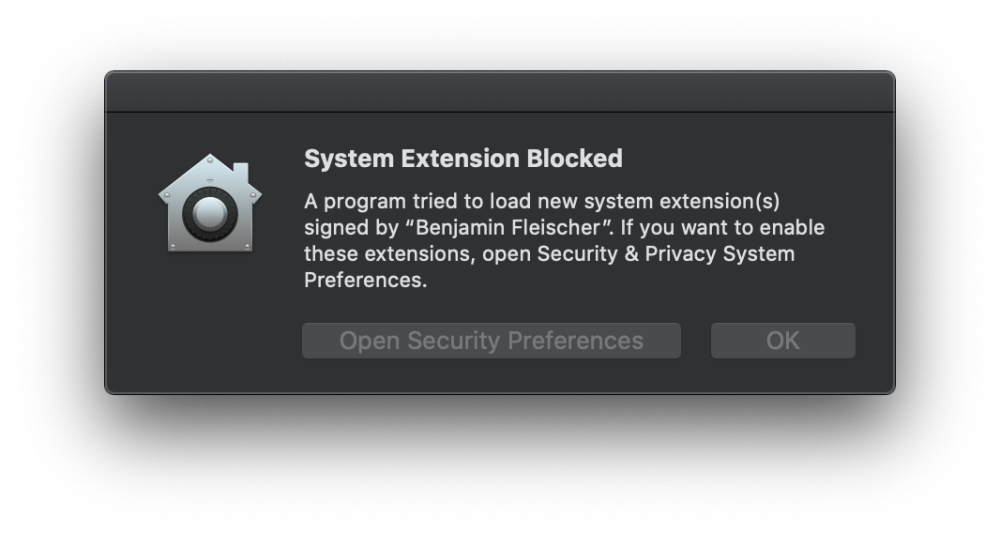
11. Click on “Open Security Preferences”
12. Once the “Security Preferences” window opens, click on the lock in the lower-left corner to unlock the settings.
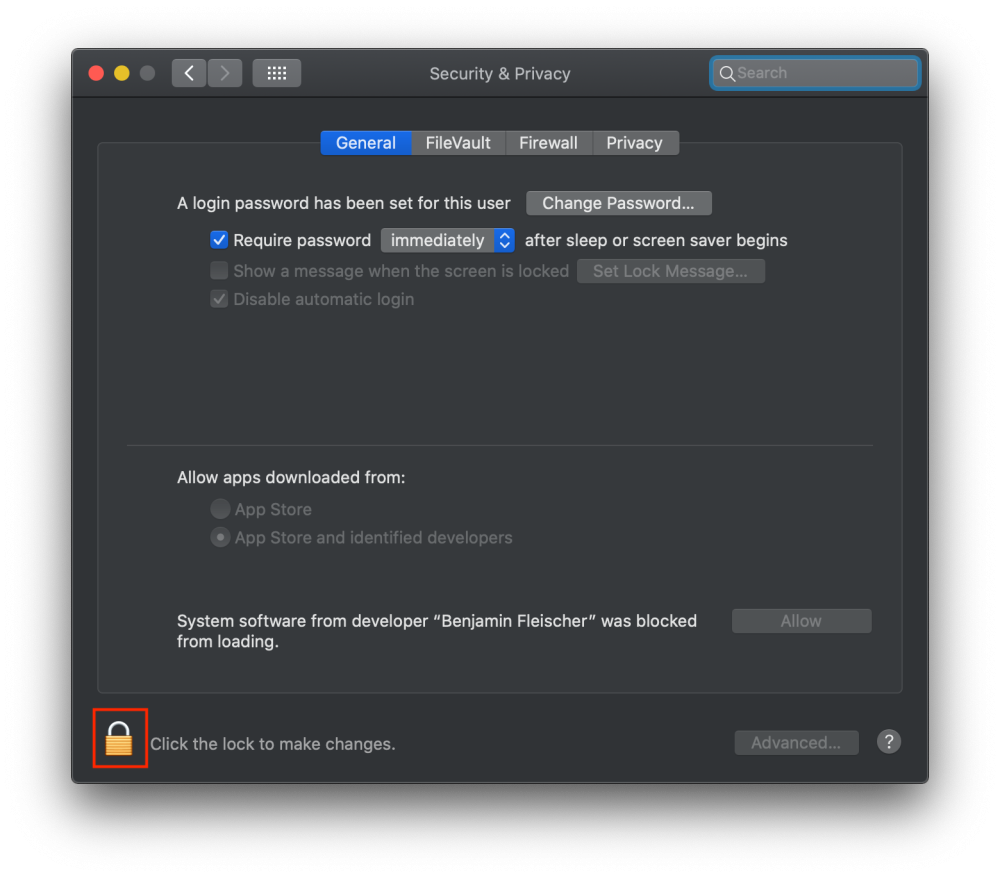
13. Once the settings are unlocked, click on the “Allow” button next to the message “System software from developer “Benjamin Fleischer” was blocked from loading”.
Troubleshooting
I have granted Osiris “Full Disk Access” but I still see the message “Application Helper Authorization denied by macOS”.
1. Go to “System Preferences” → “Privacy” and click on “Full Disk Access”
2. Check the box next to the entry “io.projective.osiris.continuumtransfunctionerhelper”
![]()
3. Start Osiris again
Need more help with this?
Visit the Projective Support Websites